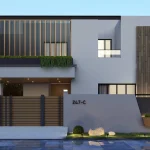
Building a dream home in Pakistan is an exciting journey, but it requires meticulous planning and a clear understanding of the local construction process. From securing approvals to putting the final decorative touches, here is a complete, step-by-step blog with an estimated timeline to help you navigate your residential building project successfully.
Phase 1: Planning and Legal Formalities (Estimated Time: 1–2 Months)
This foundational phase is crucial for ensuring the project is financially viable, legally compliant, and structurally sound before any physical construction begins on your residential plot. Rushing through this stage often leads to costly rework, delays, and potential legal penalties later on. It involves defining your vision, assembling your professional team, conducting essential site testing, and securing the necessary permissions from local governing bodies.
Finalize Your Vision and Budget
Defining your vision means having a clear idea of the house’s scope, including the number of rooms, desired finishes, and a realistic ceiling on the total expenditure. This initial financial framework must allocate specific funds for land purchase, documentation, the gray structure (the essential concrete shell), and the finishing works (tiles, paint, fixtures). Establishing this detailed budget early prevents mid-project financial crises and helps ensure that the subsequent architectural designs remain feasible and aligned with your monetary capacity.
Hire Professionals (Architect, Structural Engineer, and Contractor)
Selecting the right professional team is arguably the most critical decision in Phase 1 for construction quality in Pakistan. The architect is responsible for the aesthetic design and functional layout, while the structural engineer guarantees the building’s safety and integrity, particularly concerning seismic loads. A reliable contractor is then hired to execute the plans, typically through a formal Construction Contract that clearly specifies the materials (via a Bill of Quantities or BoQ), the payment schedule, and the strict project timeline.
Soil Analysis and Site Preparation
Before any groundbreaking can take place, a professional soil analysis must be performed to assess the plot’s load-bearing capacity and the type of soil present. This critical information guides the structural engineer in designing the appropriate foundation depth and strength, preventing future settling or structural issues. Concurrently, initial site preparations involve clearing debris, leveling the plot, and importantly, applying a layer of termite proofing treatment to the ground before excavation to protect the future structure.
Obtain Approvals and No-Objection Certificates (NOCs)
The most time-consuming legal task is obtaining the official Building Plan Approval from the relevant local development authority, such as LDA, CDA, or the Cantonment Board. This requires submitting architect-drawn and engineer-stamped blueprints for legal compliance review. Simultaneously, applications must be made for utility connections like electricity, gas, and water/sewerage. Securing these official No-Objection Certificates (NOCs) prevents future legal disputes, fines, or, in the worst- case, forced demolition of the illegally constructed parts of the building.
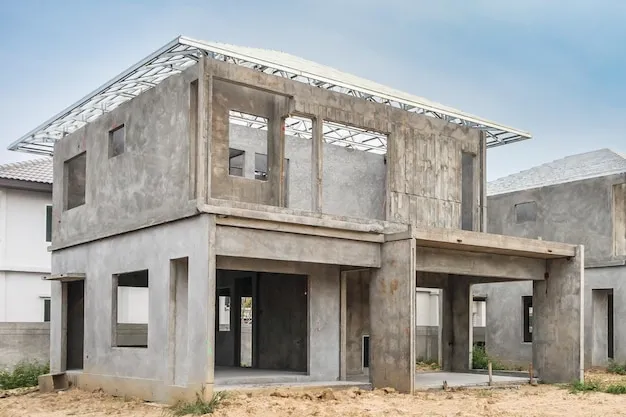
Phase 2: Gray Structure Construction (Estimated Time: 4–8 Months)
This phase is the heaviest and most critical part of the entire building process, as it involves creating the robust, permanent, un-finished shell of your house. The gray structure includes the foundation, columns, load-bearing walls, roof slabs, and primary internal plaster. Its successful completion relies heavily on the quality of materials (cement, steel, brick) and adherence to the structural engineer’s drawings. The time taken varies significantly based on the plot size, complexity of the design, and the construction team’s efficiency.
| Plot Size | Estimated Timeline (Gray Structure Only) |
| 5 Marla | 3 – 4 Months |
| 10 Marla | 4 – 6 Months |
| 1 Kanal | 6 – 8 Months |
Site Preparation and Foundation Laying
Following the architect’s and engineer’s plans, the process begins with excavation of the soil to the specified depth for the foundation trenches. After the trenches are dug and leveled, a layer of lean concrete (PCC) is poured, which serves as a base. Steel reinforcement bars are then installed according to the structural design, and the concrete footings are poured to create the primary anchors of the house. This meticulous process ensures the entire structure has a strong and stable base that can safely transfer the building’s load to the underlying soil.
Masonry Work and Superstructure Construction
This step involves erecting the vertical elements of the structure. Brickwork commences to build the outer and inner walls, adhering strictly to the planned layout. Simultaneously, the vertical concrete elements—the columns and beams—are formed using wooden or metallic shuttering, reinforced with steel, and then poured with concrete. Once the walls reach the height of the ceiling, shuttering is prepared for the roof slab. This process is repeated for each floor, ensuring proper curing of the concrete for optimal strength before load is applied.
Roofing (Slab Casting) and Curing
The most significant structural element is the roof slab. After the necessary steel reinforcement bars are intricately tied within the slab formwork, the concrete is poured. This phase requires meticulous attention to the thickness and quality of the concrete mix. Critically, the slab must then undergo a controlled curing period, where it is kept consistently moist (often by ponding water) for up to two to three weeks. This curing process is vital; it prevents the concrete from cracking and allows it to achieve its maximum specified compressive strength as designed by the structural engineer.
Rough-In (Plumbing and Electrical Conduits)
Before the interior walls are plastered, all essential service lines must be integrated into the structure. This is known as the rough-in. It involves embedding electrical conduits (plastic piping for wires) within the walls and ceiling slabs, and installing the primary plumbing lines for both fresh water supply and drainage/sewerage. This step requires close coordination between the electrical and plumbing teams to ensure that all outlets, switches, and fixtures will align correctly with the final finishes. Mistakes here are very costly to fix later.
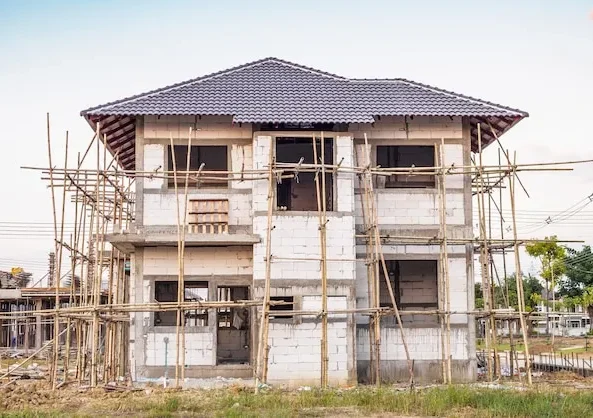
Plastering (Internal and External)
The final step in completing the gray structure is applying cement plaster to all brick walls, both on the interior and exterior surfaces. This layer provides a smooth, level finish that is essential for receiving the finishing materials like paint, wall textures, or external cladding. High-quality plastering seals the brickwork, protects the structure from the elements, and corrects any minor unevenness in the masonry. Once the plaster is complete and cured, the house is officially a finished gray structure, ready for the final, decorative finishing work.
Phase 3: Finishing Work (Estimated Time: 3–6 Months)
This phase transforms the rough concrete shell, or gray structure, into a habitable and visually appealing home. The timeline is highly dependent on the quality of finishes chosen, as complex tile patterns, custom carpentry, and high-end fixtures require more time for procurement and installation. Finishing work involves precise installation of materials, covering the rough plumbing and electrical work, and applying the final layers of paint and detailing. This is where the house truly takes on its intended aesthetic and functional characteristics.
Flooring and Wall Finishes Installation
This step involves laying the chosen flooring materials, which can range from ceramic tiles and porcelain to marble or wooden flooring, based on the design specifications. In bathrooms and kitchens, wall tiles are installed up to the designated height, ensuring a waterproof and easy-to-clean surface. This work requires skilled masons to ensure perfect leveling, alignment, and proper sloping in wet areas for drainage. Proper curing time for the adhesives and grouts must be allowed to prevent future issues like cracking or detachment.
Ceiling and Woodwork Installation
The focus shifts to adding the aesthetic and functional interior elements. False ceilings (often made of gypsum or PVC) are installed to house concealed lighting and improve the room’s overall look, a very popular feature in modern Pakistani homes. Simultaneously, all door frames and doors are fixed into position, followed by the installation of custom kitchen cabinetry, wardrobe units, and any built-in shelving. This woodwork must be done accurately to ensure proper fit and smooth operation of drawers and doors.
Final Electrical, Plumbing, and HVAC Fittings
This stage involves connecting the internal systems to the visible fixtures. All electrical fittings are installed, including light fixtures, switches, power sockets, and ceiling fans. The plumbing team installs all sanitary fixtures, such as wash basins, toilets, faucets, showers, and geysers. If an HVAC (heating, ventilation, and air conditioning) system is part of the plan, the split units or air ducts are connected and commissioned. Careful testing is conducted to ensure all points are functional and free of leaks.
Painting and Exterior Facade Completion
The house receives its final protective and decorative coatings. Interior walls are prepared with putty to achieve a smooth finish, followed by primer and multiple coats of the final paint color. The exterior often involves specialized finishes, such as textured paint, stone cladding, or plaster detailing, which define the home’s curb appeal. High-quality exterior paint is essential for weather resistance. This step gives the house its final color palette and aesthetic personality.
Final Touches, Railings, and Site Cleanup
This is the very last stage before handover. Railings for staircases and balconies, along with the main gate and boundary wall fixtures, are installed. Minor details, like window grills, security system cameras, and landscaping (if applicable), are completed. Crucially, a thorough site cleanup is performed, removing all construction debris and residue, ensuring the house is spotless and ready for immediate occupancy. This final preparation ensures the home is presented in its best, move-in ready condition.
Phase 4: Post-Construction (Estimated Time: 1–2 Months)
This final, crucial phase marks the official transition of the property from a construction site to a finished home ready for occupancy. It involves formal inspection, administrative closure with the local authorities, and the final handover of the property to the owner. While the heavy construction is over, these administrative and quality-check steps are essential for legal compliance, ensuring the longevity of the structure, and settling all contractual obligations with the contractor and architect. Neglecting this phase can lead to future legal issues or unresolved maintenance problems.
Final Inspections and Punch List Creation
A thorough final inspection is conducted by the owner, often accompanied by the architect or project manager, to review every aspect of the finished home against the approved drawings and quality standards. This process results in a “Punch List”—a detailed document listing minor, unfinished, or defective items that require immediate rectification by the contractor. These items might include minor paint touch-ups, sticky doors, non-functional light fixtures, or minor plumbing leaks. All contractual dues are typically settled only after the items on this list have been satisfactorily addressed.
Securing the Completion Certificate/Occupancy Permit
This is the most critical administrative step before taking legal possession. After the final inspection confirms the house aligns with the approved building plan, an application is submitted to the local development authority (e.g., LDA, CDA) for the Completion Certificate or Occupancy Permit. This legal document certifies that the building has been constructed according to the approved blueprints and zoning regulations. Without this permit, the house is technically illegal to occupy, which could lead to complications with utility connections, future sales, or insurance claims.
Final Documentation and Handover
The project concludes with the official handover of the house keys and all necessary project documentation from the contractor to the owner. This includes providing warranties for major installations (such as solar panels, HVAC systems, or built-in appliances), material specification sheets, and a complete set of as-built drawings. The final payment is released to the contractor, and the construction contract is closed. This thorough documentation is vital for future maintenance, renovations, and proof of legal compliance for the property.
Final Thoughts
While a smaller, less complex house (5 Marla) might take 7 to 9 months to complete, a standard 10 Marla or 1 Kanal house generally takes about 9 to 14 months from groundbreaking to final handover, provided there are no major delays with funds, permits, or weather (like monsoon season). By meticulously following these steps and keeping a close eye on the timeline, you can transform your plot into a structurally sound, beautifully finished residential space in Pakistan.